


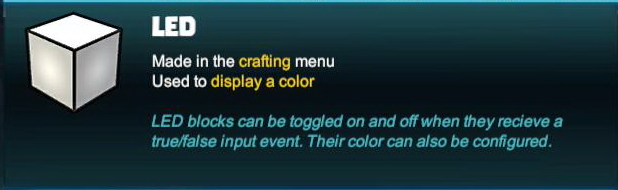
Basic Information[]
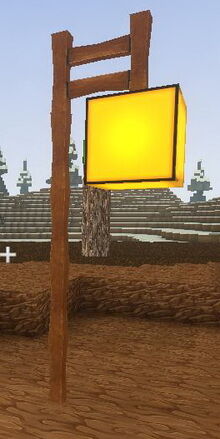
The LED is basically a glowing light cube that can be set to one of many different colors with the Wiring Tool. LEDs can be switched on and off, can be wired to activation devices and optionally to operating gates in between.
Different from actual Lightings in Creativerse, an LED does not illuminate its surrounding, so it also does not prevent Creatures or random Treasure Chests from spawning close by under otherwise fitting conditions.
How to obtain[]
LEDs cannot be found in Treasure Chests nor can they be obtained from any Creatures.
Instead, an LED can be crafted in your crafting menu (to be opened by pressing the default key "q") after its crafting recipe has been unlocked.
Already crafted LEDs can also be bought as parts of block kits that can be purchased for (customizable) Blueprints with ingame Coins (purchasable via Coins bundles in the ingame Store to be paid via Steam Wallet). Receiving already crafted LEDs as part of block kits for Blueprints will not provide you with their crafting recipe though.
How to unlock the crafting recipe[]
The crafting recipe for LEDs can be unlocked for free in your Crafting Menu by:
- crafting Wood Burning Lamps or obtaining them from Diamond Treasure Chests or from Things that both spawn on Corrupted Blocks like on the Corruption layer,
- crafting a Wiring Tool,
- and crafting a Switch
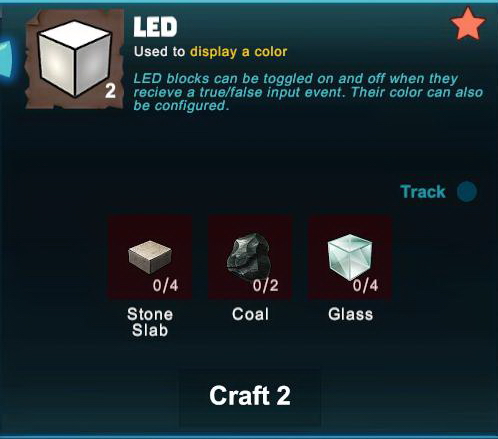
How to craft LEDs[]
To craft 2 LEDs at a time, you'll need:
- 4 Stone Slabs made in a Processor from Stone, Limestone or Bedrock
- 2x Coal extracted from Coal Nodes that can be found on the Fossil layer underground or in Mountains, or taken from randomly spawning Treasure Chests, or obtained from Keepas of any kind
- 4 Glass blocks made from Sand in a Forge together with some Fuel
How to use LEDs[]
LEDs are part of the Wiring-System in Creativerse.
After being placed into the game world, LEDs can either be switched on or off when they receive a true or false input "event" given by an activation device or when activated/deactivated manually (by clicking your right mouse button or typing "f" as the default key while pointing your cursor at the LED).
The color and interaction permission of LEDs can be configured too, but only with a Wiring Tool equipped.
An LED is not a "real" Lightings, since it does not illuminate the surrounging area, but merely glows. This means it also cannot prevent Creatures or random Treasure Chests from spawning directly next to it under otherwise fitting conditions. This glowing block does not emit any heat and cannot set flammable materials on fire.
You can rotate LEDs by pressing and holding R and moving the mouse while holding the left mouse button, however only sideways because of their specific functionality. The chosen rotation angle can be "locked" too by simply typing "r" while pointing the cursor at an already rotated block or object, so that all LEDs of the same stack will then be placed facing the same direction.
LEDs do not need any fuel or power-source to keep on glowing and will not go out by themselves after being placed in the world and switched on.
How to wire LEDs[]
| LEDs can be wired to activation devices like Switches, Sensors, Number Pads or Pressure Plates etc., optionally with operating gates in between, like Number Comparison Gates, Delay Gates, Flip-Flop Gates, Inverter Gates, Logic Gates, etc. LEDs will then serve as receivers and can be switched on or off. |
An LED is an input-machine, a receiver that does not send any signals.
To toggle the LED on or off, you can either press the right mouse button or "F" as the default key while pointing at the LED with your cursor.
If you equip a Wiring Tool and point at an LED with the cursor, the LED will display the receive hotspot overlay-image. ![]()
By clicking on this hotspot, the LED can be connected with the send hotspot of an activation device or an operating gate (Logic Gate, Delay Gate, Inverter Gate, Flip-Flop Gate, Number Comparison Gate).
Activation devices (like Sensors, Switches, Pressure Plates, Number Pads etc.) will send either a "true" (when activated) or "false" (when deactivated) signal to the LED that will either turn it on (when "true") or off (when "false") accordingly. This basic principle can be made use of by operating gates to create a variety of functions.
Operating gates like Number Comparison Gates can be connected to define more exact (de)activation terms. For this purpose, connect the "Send" Hotspot of an activation device to the left "Receive" Hotspot of the operating gate, and then connect the "Send" Hotspot of the operating gate to the "Receive" Hotspot of the LEDs.
Change the setting of the operating gate/s to your liking. For Number Pads, it's advisable to write the correct number code into the right input array (2) in their settings window and select "value" instead of "event".
Interface (Menu)[]
To open the LED interface window, you will have to equip a Wiring Tool and then press "n" (as the default key) while pointing at the LED that has been placed into the game world with your cursor.
Using this interface window, you can:
 click on this icon to rename the LED with another description up to 30 characters long. The new label will replace the word "LED" that is shown when "looking" at it with the cursor in the game world
- click on this icon in order to change the permission settings so that only other players with a specific or higher permission rank than this defined permission rank can change the settings of the LED or even take this object away
- toggle manual interaction - the LED can be "locked" by disabling the "can interact" button, so other players will not be able to switch on/off the LED directly - but perhaps with an activation device wired to the LED if you choose so
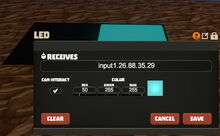
- for easier wiring purposes, you can write a code word into the input array ("Receives") here, and then write that same code word into the output array ("Sends") of an activation device that can even be placed as far away as in the opposite corner of the same game world
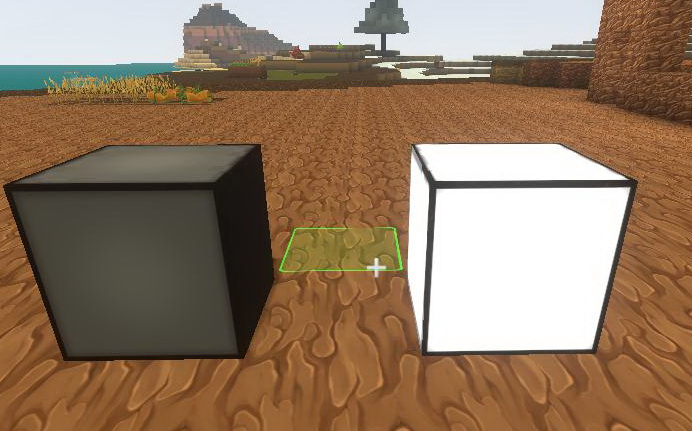
- a certain color (RGB) can be defined for the LED by entering a value ranging from 0 to 255 for blue, red and green. You can alternatively use the sliders below for this
How to change the settings of LEDs[]
Wireable objects like LEDs can be activated/deactivated by players of all permission ranks, even by visitors, unless their interactivity is disabled for all players with a Wiring Tool.
For this purpose you can lock your LEDs by disabling the option "can interact". You can access this option when looking at the LEDs with a Wiring Tool equipped and typing "n" (as the default key) to open the inspection window.
When disabling the option "can interact", other players cannot switch your LEDs on or off, but only if their permission rank is lower than the minimum permission level of the according LEDs. If players are either builders or even admins on your player claim or on the game world (if the LED blocks are not placed on any claimed land), then these players might not only activate/deactivate your LEDs, but even pick them up and take them away.
The padlock symbol lets you define the minimum permission rank for your LEDs that players will need to match or outrank in order to be able to see and change the settings of LEDs with their own Wiring Tool. Equip a Wiring Tool and type "n" (as the default key) to open the wiring window of the LED blocks. Look for the padlock symbol in the top right corner of the settings window.
Click on this padlock icon to check the permission setting that is currently selected. The permission level of these LEDs will be set to "world builders" by default when placing the LED blocks, and on player claims the permission will automatically be set to "claim builders" when the LEDs are placed.
When raising the permission level of LEDs with the padlock symbol, only their owner as well as players with a matching or even higher permission rank than the permission level of the LED blocks can use their Wiring Tool to change the settings (including "can interact") of the LEDs, so that they can switch the LED blocks on/off directly, or even pick them up and take them away.
How to rename LEDs[]
You can rename LEDs like most other wireable objects by inspecting them and then clicking on the icon that looks like a square note with a "pen" on it in the top right corner. To inspect them, equip a Wiring Tool and type "n" (as the default key) while pointing your cursor at the LEDs that have been placed into the game world.
You can then type up to 30 characters into the labelling array of each LED and confirm this with "enter"/"return". This name/label will then be displayed instead of "LED" when pointing the cursor at it. Picking it up will reset the name of the LED to the default again though.